Page 1 / Page 2 / Page 3 / Page 4 / Page 5 / Page 6 / Page 7 / Page 8 / Page 9
Cabane construction
Covering issues
All-flying tail concerns
Euro break and quickie construction projectPage 5
Covering decisions and weight issues
Vertical tail flutter test
Flying tail control setup
Electric flight test setup
Landing gear installation
CG and control authority concerns
Initial flight tests with naked fuselage
Flight test videos
Weight balance and ballast considerations for various events
Storage box fabrication
Front end configuration and fabrication
Alternate motor/engine installation checks
Electric Texaco propulsion and battery setup
Silk over-covering of the fuselage
Monday April 7th 2008
Well the wings are just about complete, now to make the cabane and check the wing interface.
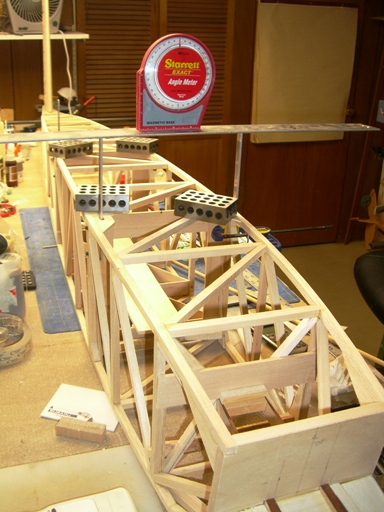
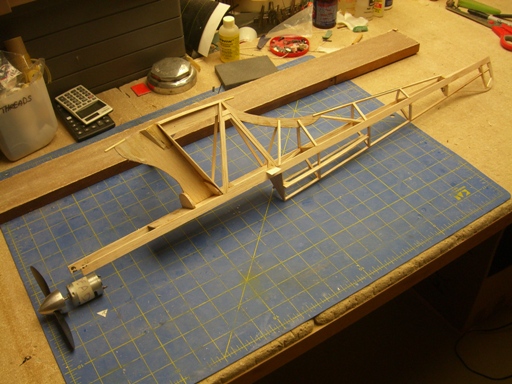
The cabane struts are made from 1/8 x 1/2 inch aluminum, drilled and threaded for 5-40 bolts. the bolts connect the struts to the spruce reinforced verticals in the fuselage structure. While I am making them I decided to allow for some adjustment in wing incidence by moving the struts up or down. Here are the struts being fitted to the fuselage. They are adjusted for alignment before the holes are through drilled. The alignment is with the horizontal tail main graphite tubular spar, just visible in the picture.
Here is the cabane with verticals fitted and horizontals installed.
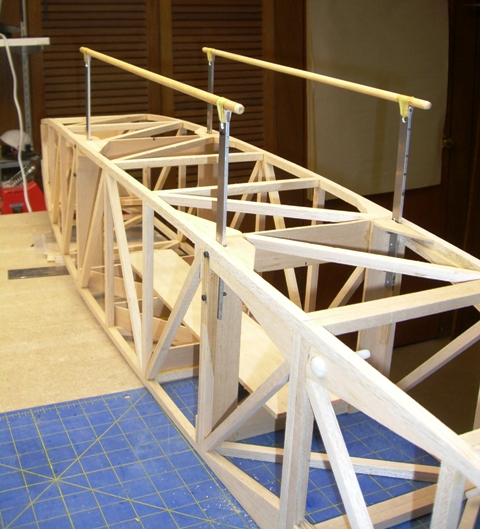
The horizontals are lashed to the verticals with strong Kevlar thread then CA'd.

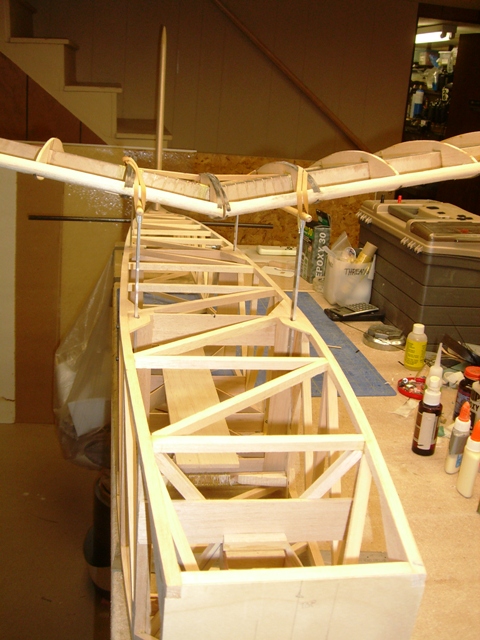
Finally the wing center sections are mated to the cabane to evaluate the interface and effects on both parts.
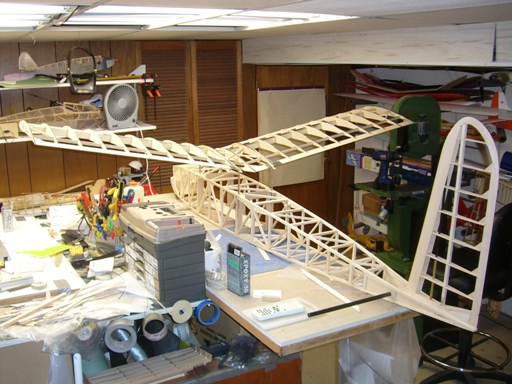
The horizontal cabane elements bear inboard of the second rib outboard of center.
This means the hold-down straps / bands will impinge on the covering about 3/4 inch inboard of the rib. I will add a false rib 1 1/2 inch inboard and sheet the leading edge to give the strap/bands something to bear on without pulling the covering out of shape.
Can't do any more this week. We are off on a college inspection trip involving a good deal of travel.
Saturday 19th April
Following the college trip I have been engaged in a major battle with an infestation of a strange large fly, something to do with an earth worm host etc. I think I won, certainly by body count, so it is back to the Giant.
The next three areas for attention are; the vertical tail mounting and control, the horizontal tail control mechanism and the airplane covering.
First the covering. My criteria is to make the plane look like an Old Timer so I would rather not use a film covering, or something that looks shiny. I also want something that is durable so an under-layer of Mylar is preferable; but what to put on top. We have been using Jap tissue with some success but that comes in such small sheets and it is quite expensive. I bought some silk from Thai Silks but chose the wrong weave, a curly one, so it ends up like 80 grit sandpaper. Silk is still an option, so if I can find my swatch of colored silks from Thai I will explore that further.
Then there are the various other tissues and polyester tissue products. The domestic tissue is inexpensive but has poor wet strength, and it has been our practice to apply it wet then smooth it with the fingers. Domestics don't do this well and you can end up with a mess. We have never tried polyester tissue over Mylar and wonder how it might work. Perhaps you could glue it around the edges then heat shrink it with a heat gun, then dope it. The weaves are not air-tight so perhaps the air could escape avoiding bubbles and maybe dope would bleed through to bond the two layers together. Who knows?
I could abandon the Mylar and just use polyester but my experience is the cross-grain strength is poor and my Bomber has a zillion small slits where it contacts the overhead strapping in my van during transportation.
Paint over Mylar is easy but not very durable however, my old 1/2 A Electric Scale Texaco Cub looks quite good and not too shiny. Maybe that would be good enough.
Others have suggested painting Mylar Doculam on the glue side as being very durable but it would be shiny.
I will give this whole subject more thought as there are other things to be done before I reach this stage.
I have decided to abandon the all-flying vertical as it has too much slop and flexibility for my liking. I think it is just a disaster waiting to happen, and with little benefit. I had wanted a Giant with no visible control surfaces so as to be as much like the original as possible. But the tradeoffs and risks to achieve that seem not worthwhile at this point, so I have been looking at the existing structure with the thoughts of how to modify it to include a control surface. I currently plan to install a servo into the tail structure in much the same way you would with an aileron servo in a big plane. I think it will still use a graphite spar with the lower end bolted into a socket and a locating dowel near the nose.
The control mechanism for the horizontal gives me concerns for at least two reasons; first with a chord of 18 inches the control loads could be quite large even with the pivot at the 25% point. Perhaps a greater concern is the susceptibility of the control mechanism to handling loads. What if the airplane lands in a roll attitude and one horizontal strikes the ground at its trailing edge. This kind of problem could cause undetectable damage to the servo gear train with the subsequent threat of disaster.
My original thoughts were to use a cam control where the control and handling loads are largely confined to the cam mechanism, but I am not sure I can fit one into the space. This is going to drive me back to the drawing board (or CAD system) to get the geometry and packaging right.
The alternative that I have laid out is a bellcrank arrangement.
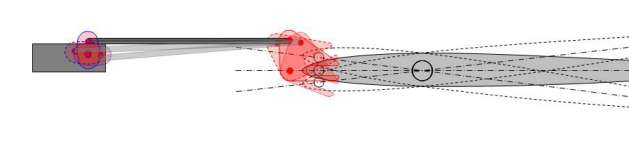
I plan to allow a +/- 6 degree range of motion. This will allow a little more than half of the total control authority from the stab. This should be more than enough although I also have to allow for trim changes. Trim can could be adjusted by the pushrod and or incidence shims on the wing/cabane interface. The first flight will be a nervous one.
Tuesday 22nd April
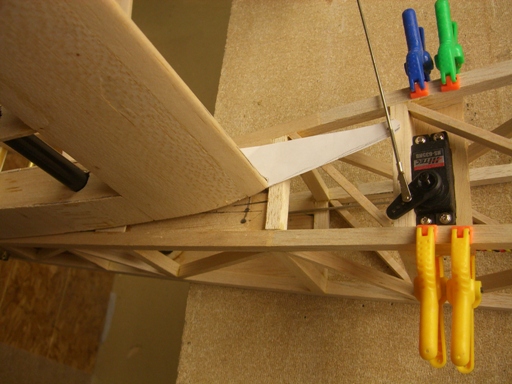
Aw heck, I just decided to simplify the whole thing and directly drive the tail on one side by and external servo link. I think the external linkage provides some insurance against handling damage by allowing me to inspect the linkage. Both side tails are attached to the graphite tubular spar and the whole assembly pivots on a pair of plywood "bearings" in the fuselage sides. So I drive one side and the other side follows. Now I can go on to the vertical tail modifications.
Friday 2nd May
Oops, just realized there is only one month to go till we depart for the Euro SAM RC Champs. Worse, now that I think about it the revised Speed 400 LMR event rules are different to last year. Thinking about the event I realized that last years airplane, a Stardust Special with 253 sq inch wing area, would fly with a 9 ounce wing loading at the new minimum 16 ounce weight. That is a significant reduction in glide time vice the 8 ounce minimum loading for the class, well, 6% actually. Doesn't sound like much but it should be about 30 seconds.
So it is clear the decks and quickly make another one at 288 sq in area.
I probably won't get back to the Giant before Europe so stop back at the beginning of July. There will be plenty of time to finish and fly it before Muncie in September.
Wednesday July 9th 2008
Well, here I am, back on the project again. I have been thinking about the next steps while getting over European trip jet lag, and I have made some decisions and done a little work.
Here is where I left off in May;
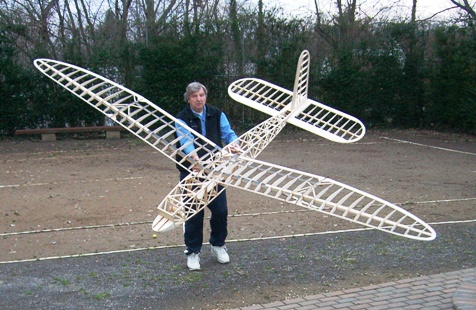
I have made a decision on covering and vertical tail. Let's start a new page; Page 5
Page 1 / Page 2 / Page 3 / Page 4 / Page 5 / Page 6 / Page 7 / Page 8